Why I Made This
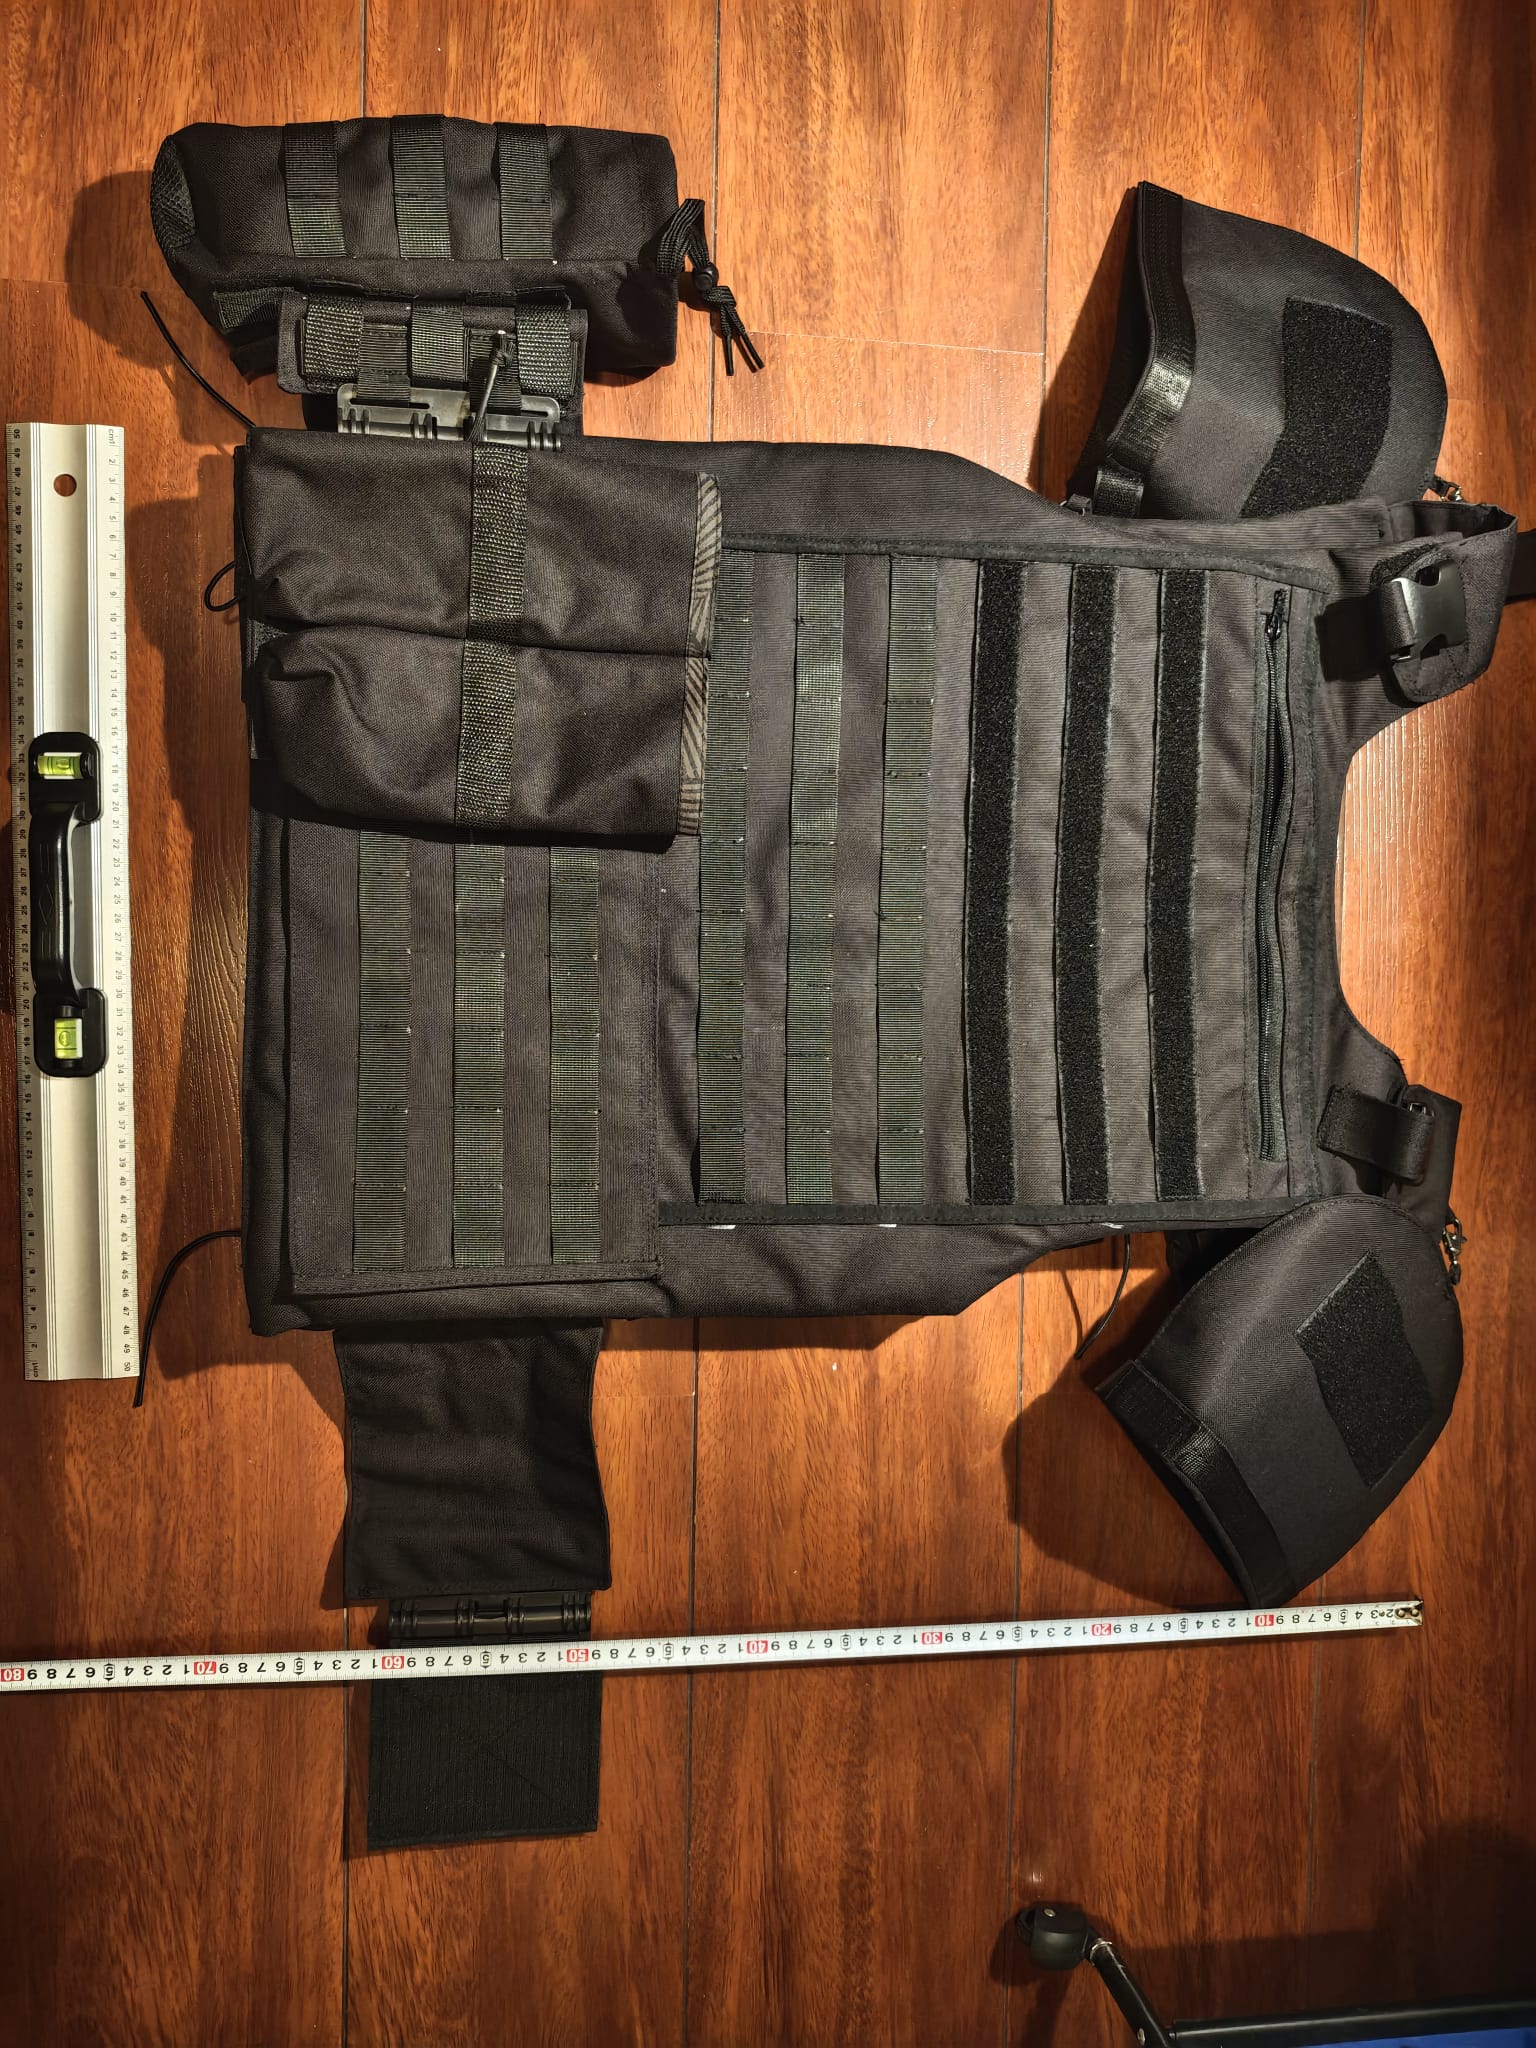
Before this project, I’d looked at plate carriers and tactical vests the way most people do — as finished products that just exist. But I had no idea how they were actually put together. What makes one vest cost $200 and another $2,000? How do you sew through half a dozen layers of nylon and Kevlar on anything less than a factory line? What decisions sit behind the placement of every stitch?
So I decided to build one myself. Not a costume piece or an airsoft replica — a real, functional carrier that had to work as a layered protective system. Out of pure curiosity, I wanted to to understand the engineering that goes into soft armor, from the material stack-up to the sewing techniques that hold everything together under load.
What I Set Out to Build
Before I touched any fabric, I wrote down what this thing actually needed to do. I wasn’t designing for a specific military contract — more like “if this were a real product, what would the requirements look like?”
| Requirement | Target | Why It Matters |
|---|---|---|
| Flame resistance | Outer layer self-extinguishing | Welding spatter, hot particles — real industrial hazards |
| Cut resistance | Kevlar layer for blade/shard defense | Metal splinters and tool fragments are surprisingly common |
| Penetration resistance | Hard plate for high-velocity fragments | Fast-moving debris isn’t something fabric alone can stop |
| Impact absorption | 10mm trauma pad | Blunt force behind the plate still needs somewhere to go |
| Modular expandability | Full MOLLE grid integration | A vest that can’t carry pouches is a vest half-finished |
| Adjustable fit | Hook-and-loop at shoulders and waist | Different bodies, different layers underneath — it has to adapt |
| Breathability | 3D mesh air channels | Heat buildup during extended wear is a real problem |
| Total thickness | ~40mm calibrated stack | Protection matters, but if you can’t move it’s useless |
The philosophy I landed on was pretty simple: don’t try to stop everything at once. That’s how you end up with an 80-pound bomb suit that nobody can actually wear for more than ten minutes. Instead, each layer in the stack addresses a specific, realistic threat. Together they cover a practical range of hazards. This is how professional protective equipment actually gets designed — it’s a configurable system, not a magic shield.
Choosing Materials — Each Layer Earns Its Place
Every single material in this vest is there for a reason. The stack order matters just as much as the materials themselves: environmental protection on the outside, ballistic and impact protection in the middle, comfort against the body.

Layer Breakdown (Outside → Inside)
| Layer | Material | Thickness | Function |
|---|---|---|---|
| Outer Carrier | 1000D Oxford Nylon | 0.5–1mm | Flame retardant, waterproof, abrasion resistant, tear resistant. This is the shell that takes all the environmental abuse — UV, moisture, mechanical wear — so the inner layers don’t have to. |
| Soft Protection | Kevlar (Aramid) | 0.3–0.5mm/layer | Scratch, fire, and cut resistant. Handles low-velocity fragments. I placed it inside the outer carrier specifically to shield it from UV exposure, which degrades aramid fibers over time. |
| Hard Protection | Steel Alloy Plate | 8mm | This is the rigid layer. High-velocity fragments, punctures, impacts — anything the soft layers can’t handle alone. It’s the structural backbone of the whole system. |
| Trauma Pad | Ventilated PU Foam | 10mm | Energy absorption and shock dampening. Even if the plate stops a projectile, the blunt force still transfers. This foam layer spreads that impact across a wider surface area to reduce trauma. |
| Inner Carrier | 1000D Oxford Nylon | 0.5–1mm | Same shell fabric as the outside. Encapsulates all the protective layers and gives the ergonomic backing something solid to attach to. |
| Ergonomic Layer | 3D Micro-mesh Air Ducts | — | The layer that actually touches the wearer. Ventilation channels create an air gap between body and armor, wicking moisture and reducing the slow heat soak that makes extended wear miserable. |
Building It — Pattern Making, Sewing, and Problem-Solving

From Paper to Fabric
The workflow was pretty standard for garment prototyping: estimate fabric needs based on body measurements, source the materials, draft paper patterns, transfer to fabric, cut, assemble. Then iterate. Every fitting round revealed something to tweak.
What I ran into:
- 1000D nylon is unforgiving: A standard home sewing machine will laugh at you — and then jam. I needed heavy-duty needles and constantly adjusted thread tension. For the thickest seam intersections, only an industrial walking-foot machine could punch through consistently. Even then, going slow was the only option.
- Kevlar eats scissors for breakfast: You cannot cut aramid fabric with regular shears. It frays, it slides, and it dulls blades almost instantly. I went through a learning curve before accepting that serrated aviation snips weren’t optional — they were mandatory. I also had to plan seam allowances more generously than I expected, because Kevlar edges unravel if you look at them wrong.
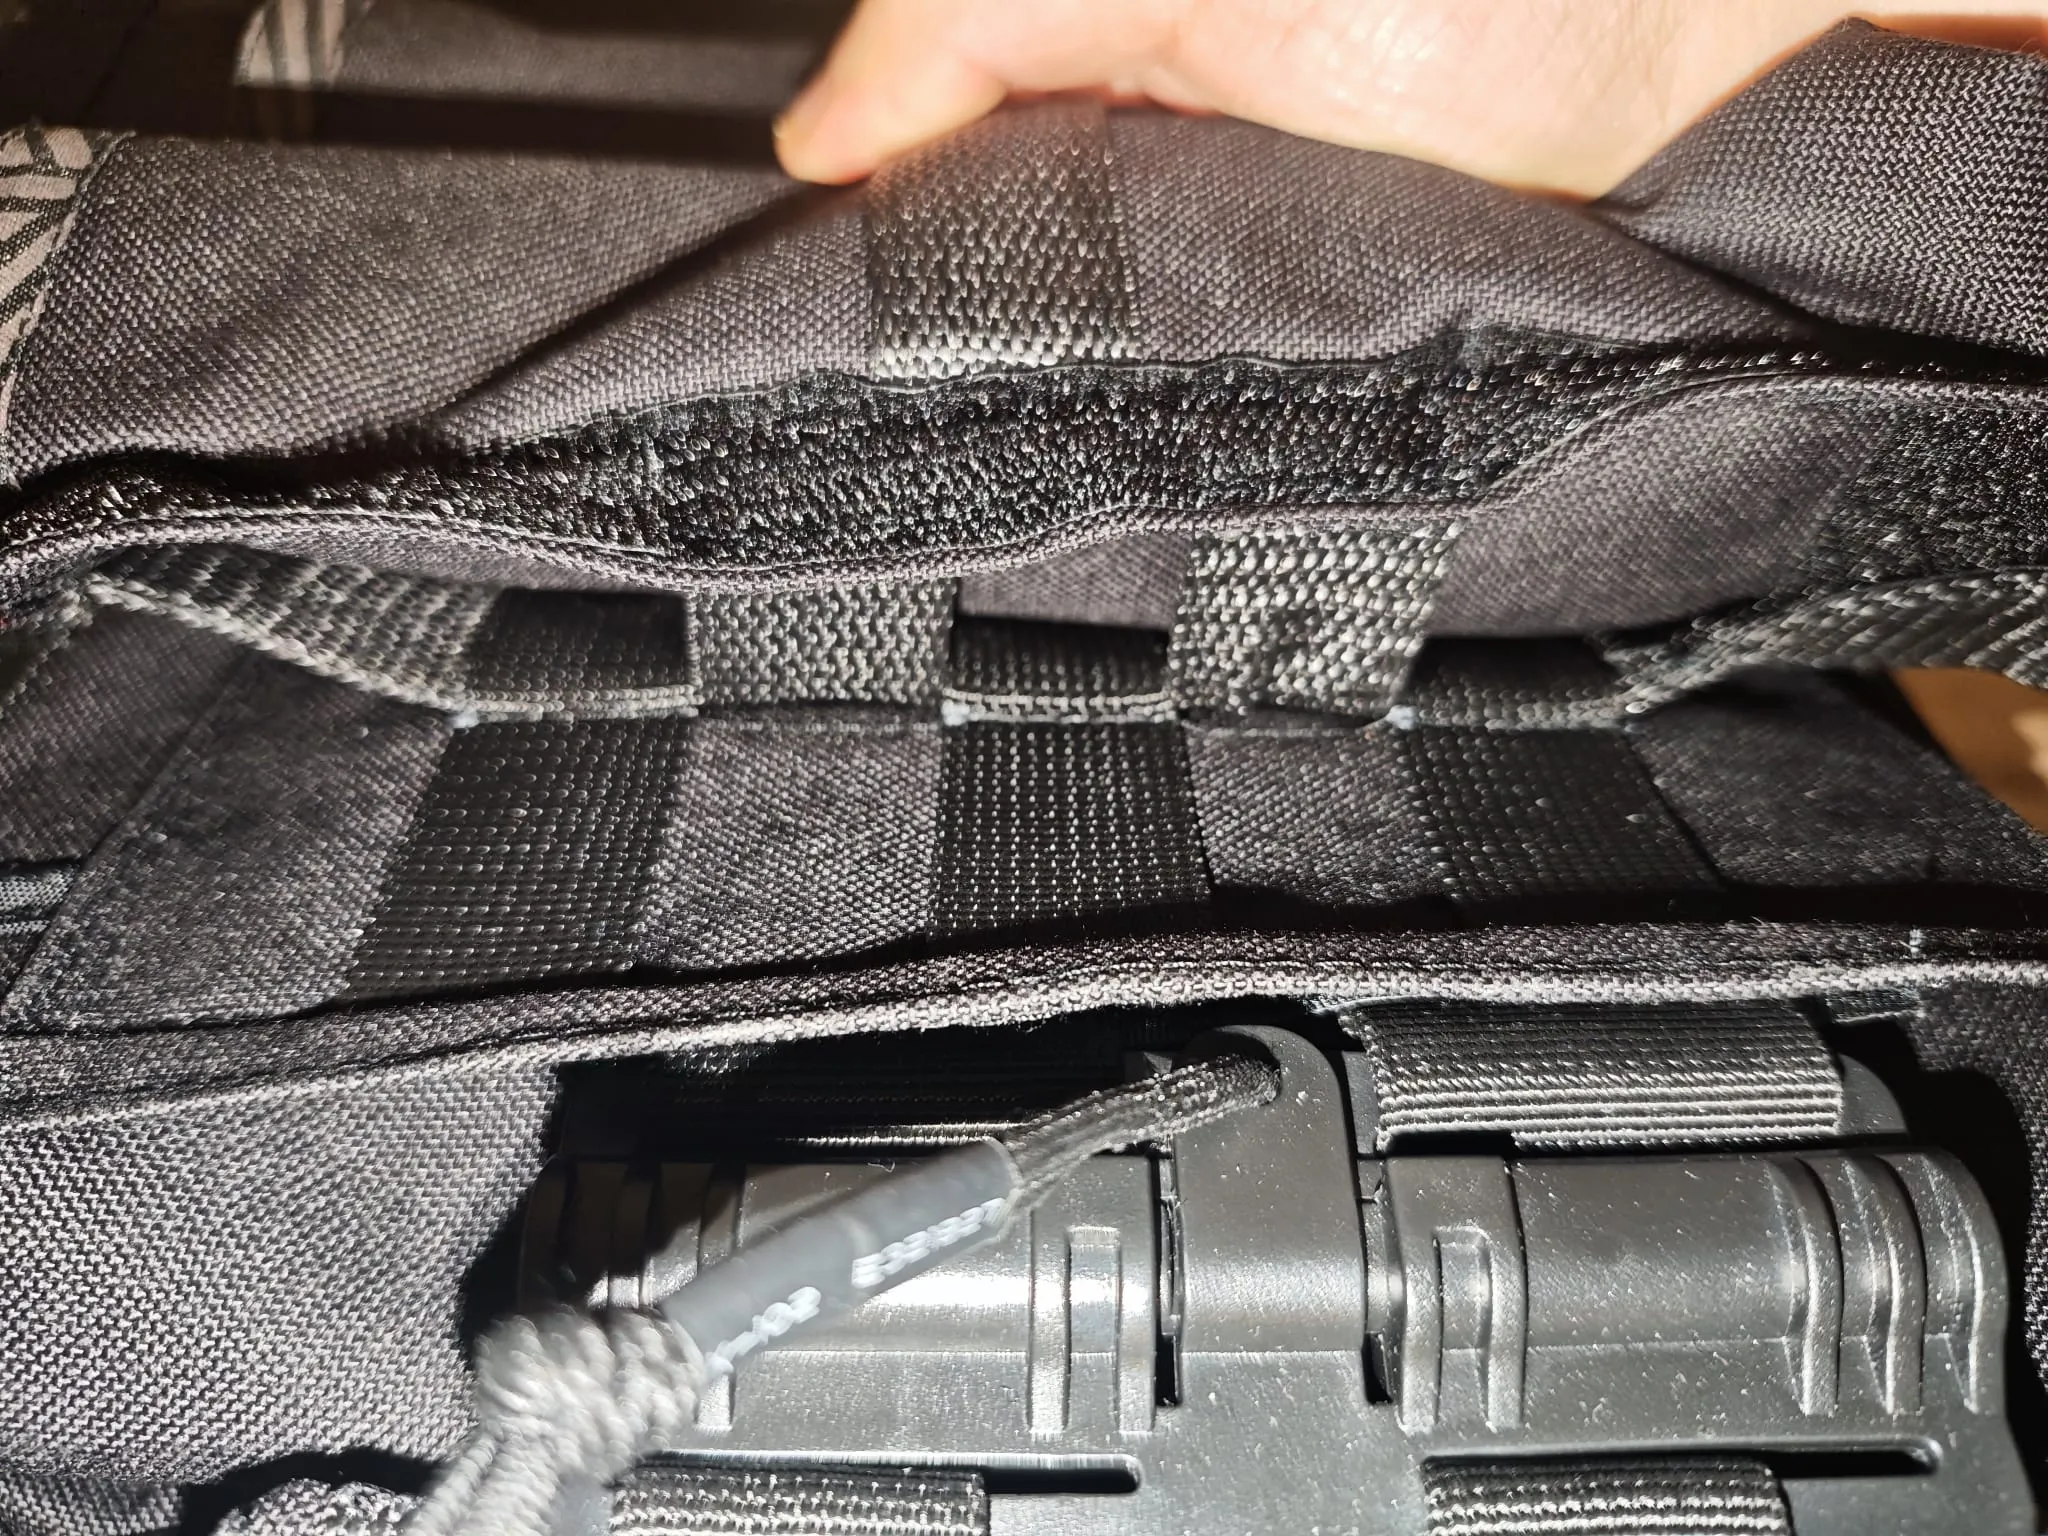
- MOLLE isn’t just sewing straight lines: The PALS grid looks simple — one-inch spacing, parallel rows of webbing. But every single attachment point needs a bartack reinforcement, and if your spacing drifts even a couple of millimeters, certain pouches won’t fit. It’s a standardized interface, and standards don’t tolerate slop.
- Adjustability is its own design problem: Hook-and-loop panels at the shoulders and cummerbund let the vest adapt to different body shapes and clothing layers. That means you don’t need to rebuild the whole thing to adjust the fit — which, if you’ve ever sewn through six layers of nylon, is a feature you’ll deeply appreciate.
Modularity at Two Scales
I thought about modularity in two directions:
- For the wearer: Hook-and-loop closures at shoulders and sides mean the vest adapts to your body, not the other way around.
- For the mission: The MOLLE grid across the front, back, and cummerbund means you can attach whatever you need — pouches, hydration, admin panels — without modifying the carrier itself.
Does It Actually Work?
I wasn’t doing ballistic lab testing in my workshop, but I did put the vest through practical validation:
- Fit testing: Multiple wear sessions, checking range of motion, pressure points, and how far the adjustments could go. If I couldn’t move comfortably, the ballistic protection didn’t matter.
- Material compatibility: Layering Kevlar against nylon sounds fine in theory, but in practice you need to verify the materials don’t abrade each other during movement. Aramid is abrasive stuff.
- Stitch integrity: I yanked on the MOLLE attachment points harder than any pouch ever would. The bartack reinforcements held — but this was where my thread tension experiments paid off.
- The hard part: Seam intersections. Some join points stacked up 6–8 layers of heavy fabric. I had to grade the seams carefully and swap presser feet to handle the bulk. This is the kind of thing you don’t appreciate until you’re staring at a sewing machine that physically cannot fit the material under the foot.
Functional Layers Cross-Section

Layer 1 — Carrier
1000D Oxford Nylon (0.5–1 mm)
Layer 2 — Soft Protection
Kevlar (0.3–0.5 mm per layer)
Layer 3 — Hard Protection
Steel Alloy Plate (8 mm)
Layer 4 — Trauma Pad
Ventilated PU Foam (10 mm)
Layer 5 — Inner Carrier & 3D Cooling Pad
1000D Oxford Nylon + 3D Micro-mesh Air Ducts
What I Walked Away With
This wasn’t about making a product. It was about understanding a category of objects that I’d only ever seen from the outside.
- Garment construction is a whole discipline: Pattern drafting, cutting, assembly, finishing — there’s a complete production workflow here that most industrial designers never touch. Working through it from start to finish gave me respect for every seam I now see on any piece of clothing.
- Heavy fabrics demand heavy solutions: 1000D nylon taught me where the line is between what home equipment can handle and what requires industrial machinery. Spoiler: that line comes fast.
- Kevlar is its own skill set: Everything about working with aramid — cutting, handling, seam planning — is different from conventional textiles. You learn this the hard way, which is to say you ruin some material first.
- MOLLE is a case study in interface design: A grid of one-inch spaced webbing sounds trivial. But when dozens of accessory manufacturers depend on that spacing being exact, every single stitch becomes an interface specification. Get it wrong and nothing fits.
- Soft goods are still industrial design: Choosing materials based on performance requirements, designing for manufacturing constraints, thinking about modularity and user fit — it’s the same design process, just with fabric instead of injection-molded plastic.
Before this project, a protective vest was just “heavy clothing” to me. Now I see it as an engineered system — material science, human factors, and manufacturing reality all converging at every single seam. That shift in perspective was the whole point.